Set Up Guide For Android
Last updated on July, 10, 2024
Customers who are planning to visit Hong Kong and Taiwan, please click here to complete real-name registration.
How to install eSIM
These steps may differ depending on your device and language.
Important Notice
01
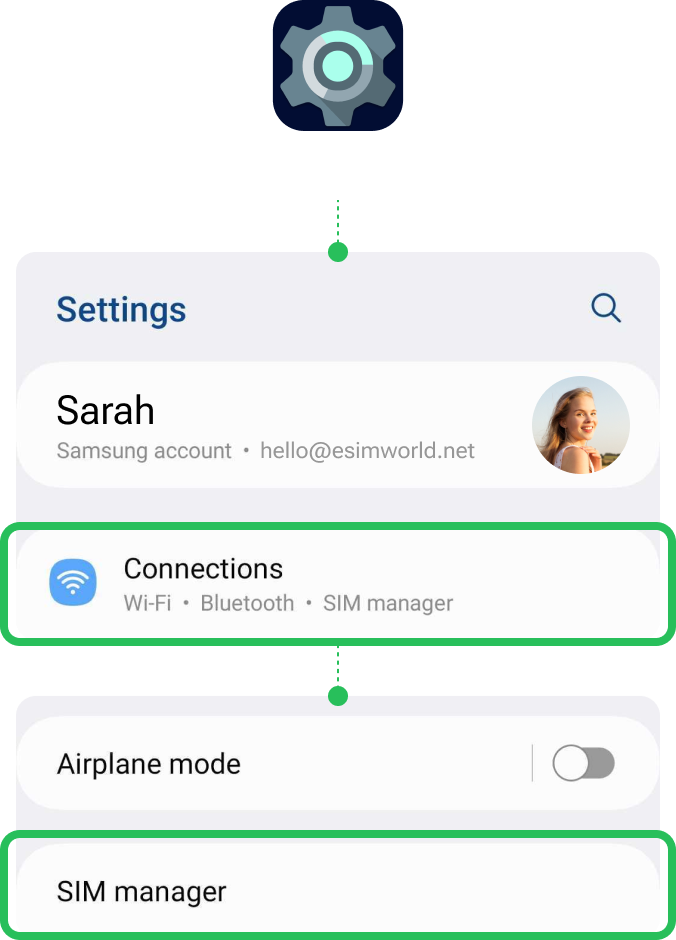
Add eSIM from the device’s Settings.
Go to Settings
Select [Connections]
Tap [SIM manager]
02
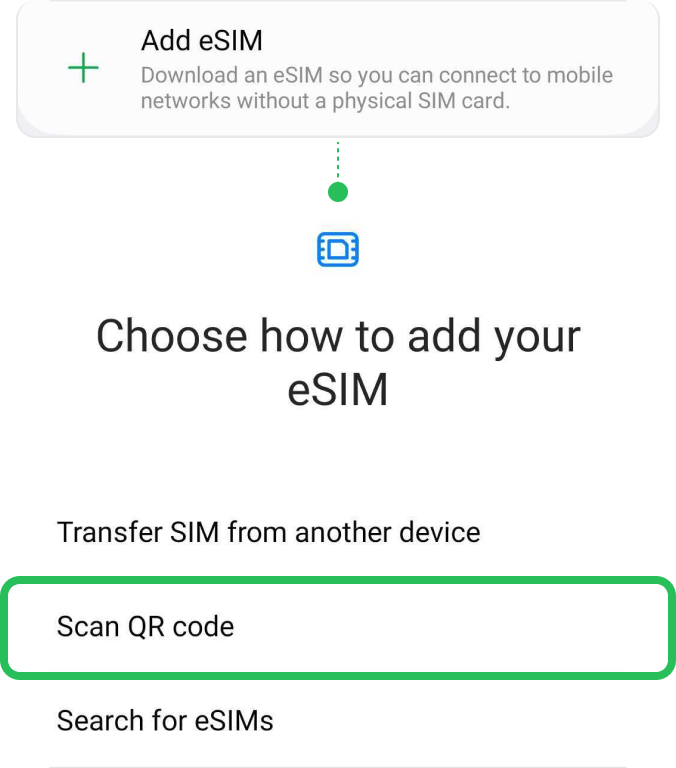
Select [Add eSIM] to install the eSIM.
Select [Add eSIM]
Tap [Scan QR Code]
03
Install eSIM via QR code or manual installation and wait for completion.
! Be connected to a strong WiFi to activate an eSIM successfully.
Either scan the QR code or manually put your eSIM details. You can find your eSIM details in the email.

04
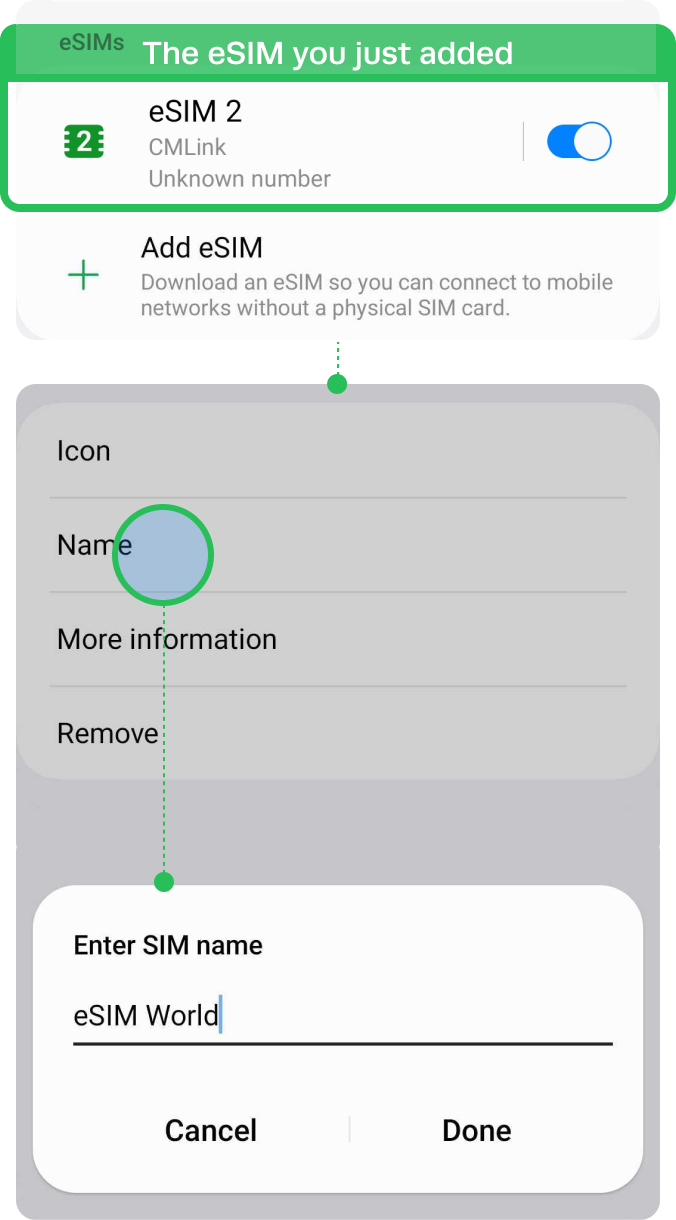
Label your eSIM.
After the successful installation, you can label it for more convenient management.
Go to Settings
Select [Connections]
Tap [SIM Managerl]
Choose the eSIM you just added
Tap [Name] and Type on new label of your own, e.g. {Destination} – eSIM World.
Installation Completed
The installation steps are done!
You are almost ready to use the data.
How to access data
These steps may differ depending on your device and language.
01
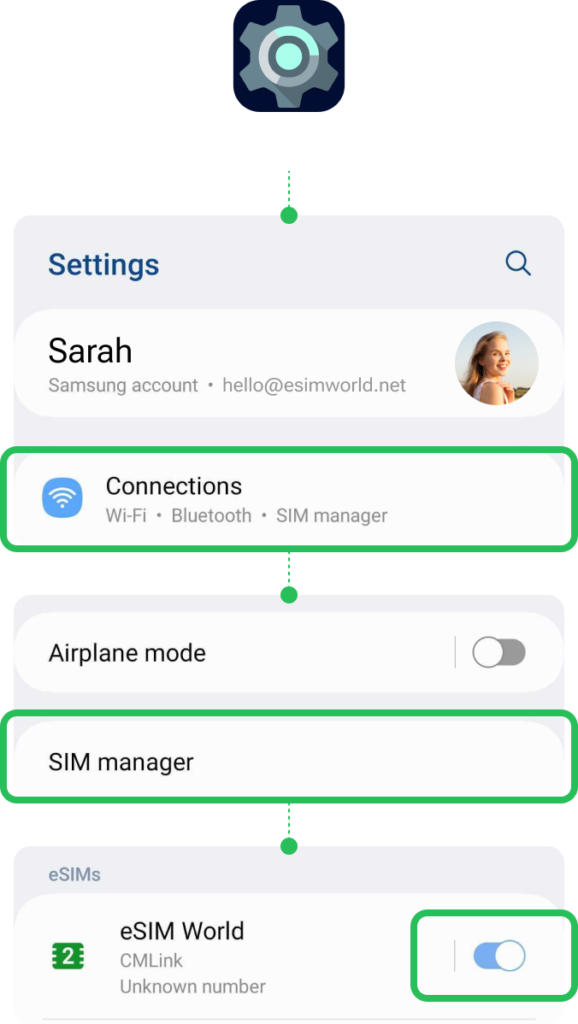
Turn on the eSIM.
Go to Settings
Select [Connections]
Tap [SIM Manager]
Toggle on your eSIM
02
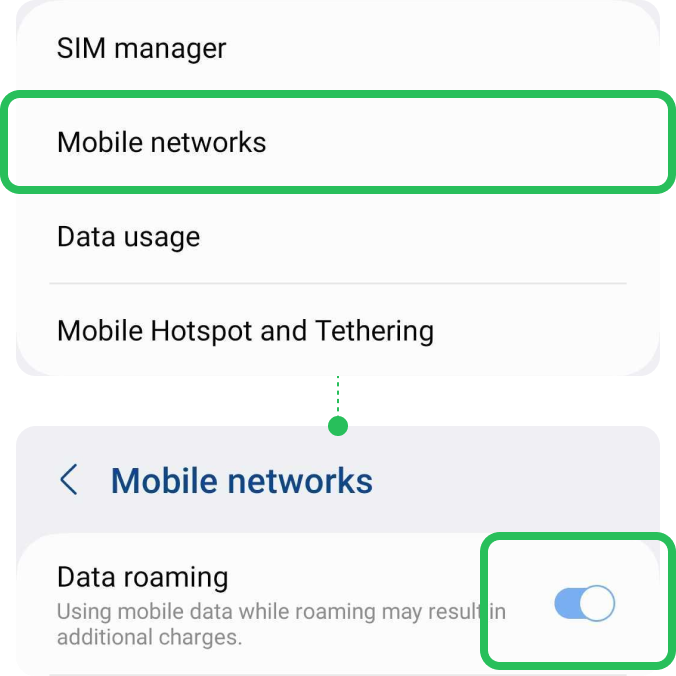
Turn on [Data Roaming] only for your eSIM.
Go to Settings
Select [Connections]
Tap [Mobile network]
Toggle on your ‘Data roaming‘
03
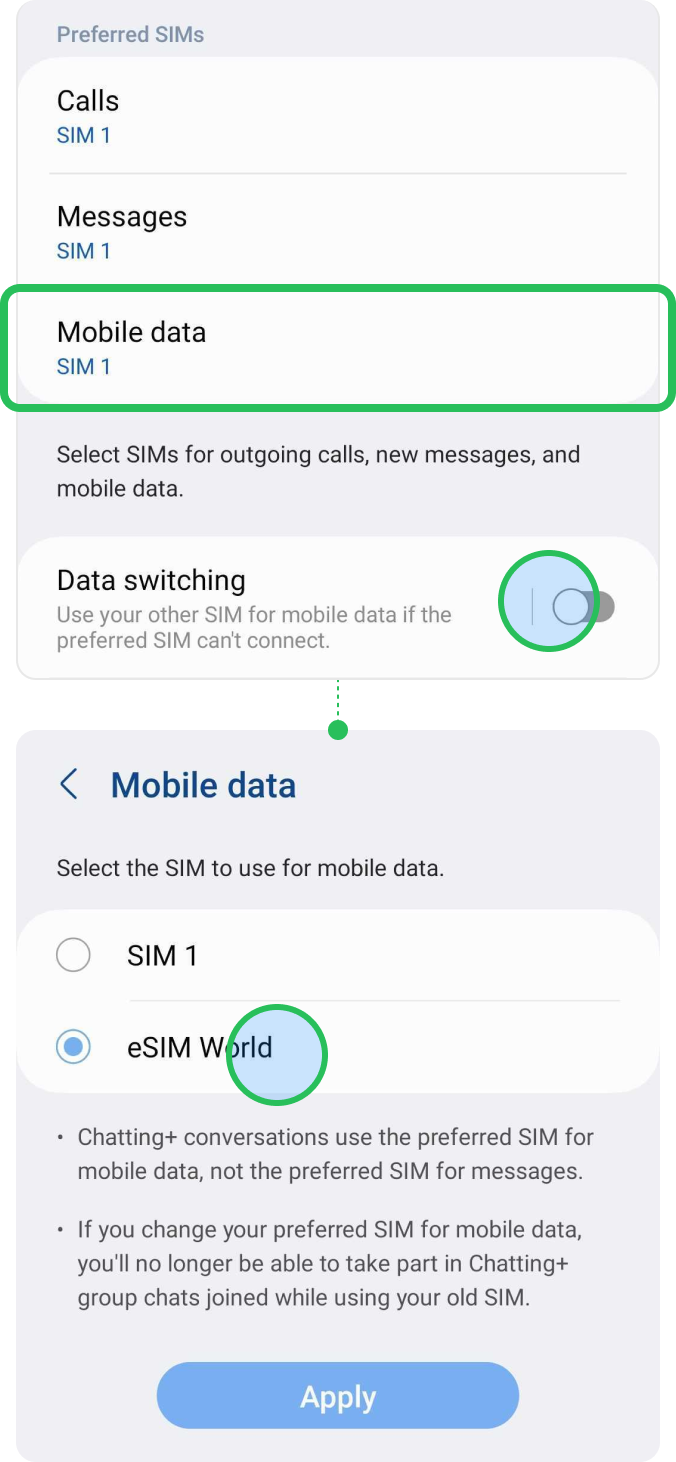
Select your eSIM on [Mobile data].
Go to Settings
Select [Connections]
Tap [SIM Manager]
Tap [Mobile data]
Select your eSIM
Please toggle off ‘Data switching’ to prevent unnecessary roaming charges from your domestic carrier.
Troubleshooting –
Still can’t access internet
If you installed the eSIM well, but cannot access the internet, please try the troubleshooting below. Also, please DO NOT remove the eSIM, since in most cases, our eSIM cannot be reinstalled or regenerated.
01
Manually perform Network Selection.
Check your plan’s Network.
Go to Settings
Select [Connections]
Choose [Mobile networks]
Tap [Select roaming network]
Tap on your eSIM in the bottom tab, and toggle off ‘Select automatically’.
When the list of networks is displayed, Select the name of the telecom in the country in which you are located.

02
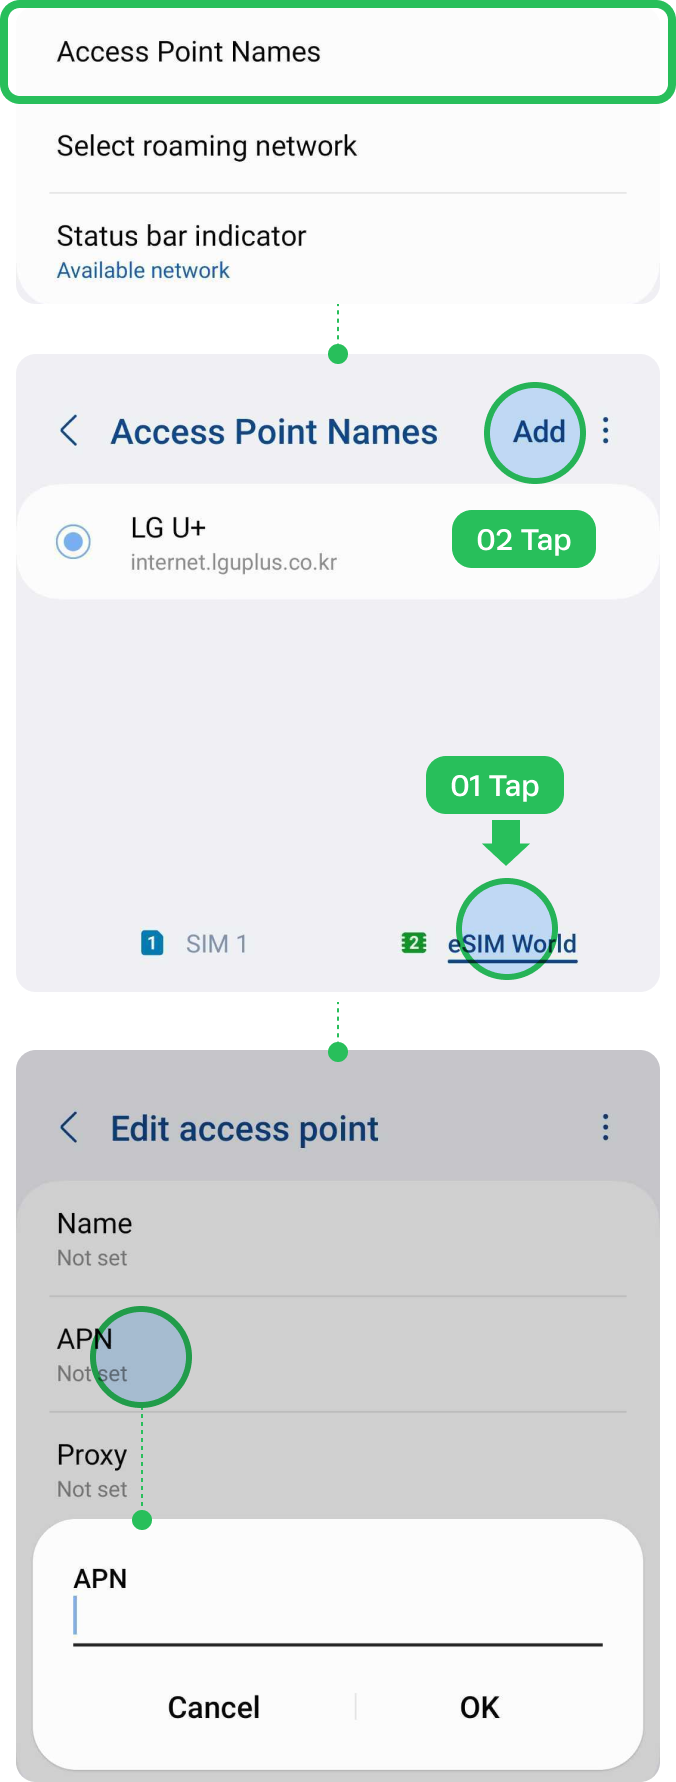
Set up APN manually if you have access.
Check your plan’s APN.
Go to Settings
Select [Connections]
Tap [Mobile Networks]
Choose [Access Point Names]
Try clicking on [Advanced] if it’s not visible.
Tap on your eSIM in the bottom tab.
Tap [Add]
Tap [APN]
Type the APN information and save.
Select the APN you just created
Restart the device
How to select local phone number
If you have trouble using the local phone number, and cannot make a call or send an SMS, please follow the steps below.
Important! This instruction is only applicable to the eSIM plans which include local phone number and Calls feature.
Select your eSIM on [Calls] & [Messages].
Go to Settings
Select [Connections]
Tap [SIM Manager]
Tap [Calls]
Select your eSIM.
Tap [Messages]
Select your eSIM.

Before using eSIM
* The following steps only apply to visitors to Hong Kong and Taiwan.
To successfully use eSIM in Hong Kong & Taiwan, a real-name registration is mandatory. Make sure that you complete the registration before arriving in Hong Kong & Taiwan.
Review the directions,
then click the button to start registration.
Destination
Select the destination for real-name
registration.

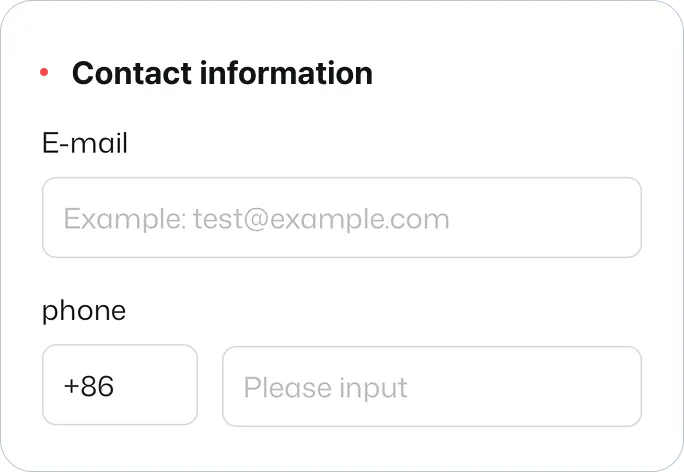
Contact information
Provide either your email address or
phone number.
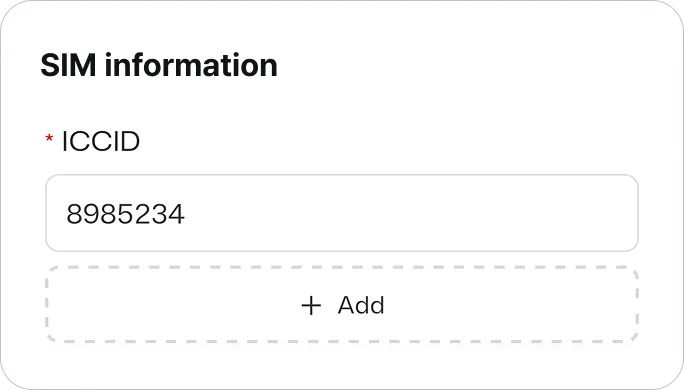
ICCID
Put ICCID of the eSIM for your destination, Taiwan or Hong Kong.
Find ICCID in the email with the QR code.
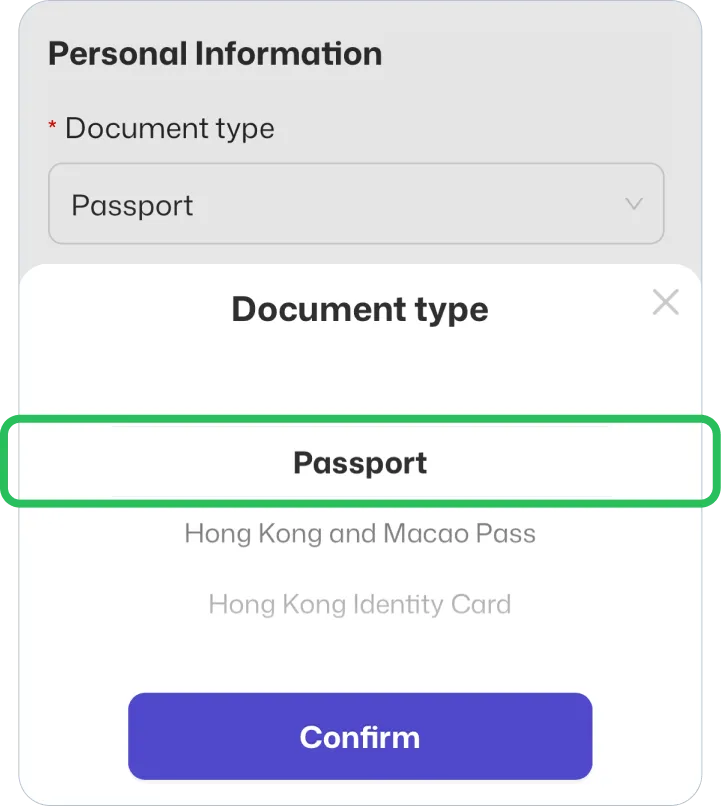
Document Type
Select “Passport” and click confirm.
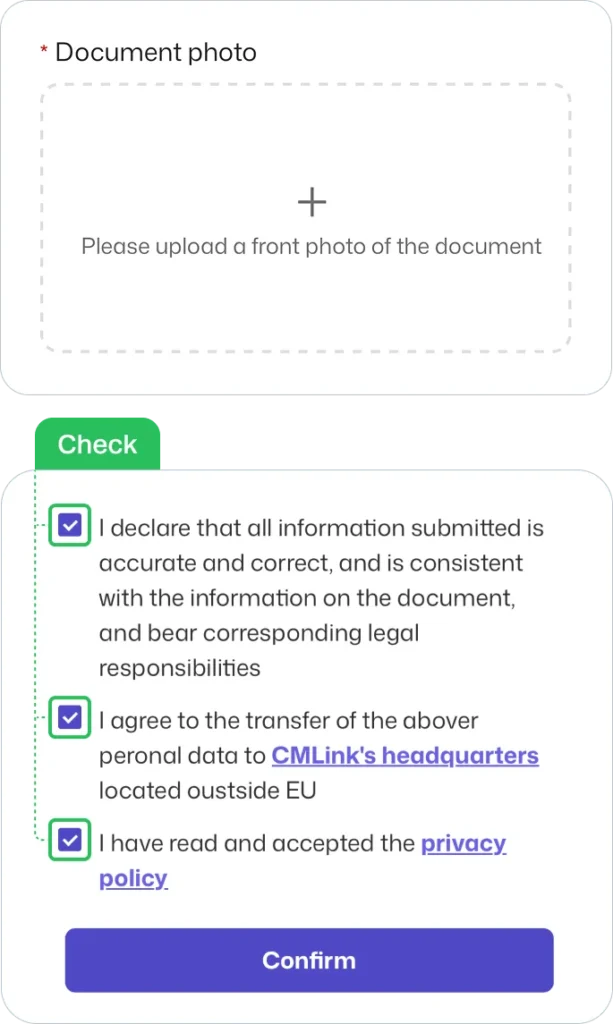
Document Image
Upload picture of your passport. Check the box and click confirm.
